|
Removal and Replacement Instructions
(steps 31-40 of 60)
- Clean the head/intake mating surfaces, again taking care not to drop any debris into the intake ports or F.I. bosses.
NOTE: It is recommended that you use paper shop towels and NOT cloth rags for cleaning these
engine surfaces. Cloth rags can drop lint and/or threads into the engine and potentially cause problems.
Paper particles will more readily disintegrate/dissolve in the engine.
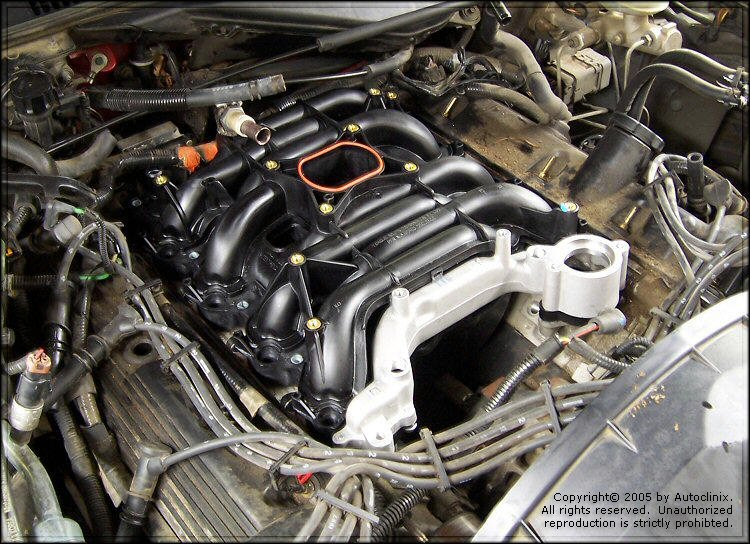
- Optional: Replace spark plugs. We chose to do this for two reasons. First, our test car had 95K+ miles on it and still had the original plugs. Secondly, the spark plug "wells" tend to get flooded with coolant when the manifold splits and spills it guts. For example, on our car the #8 spark plug well was filled with coolant when we removed the plug wire. The others were wet to some degree as well. Given how cheap plugs are (even the platinum plugs we used) and how accessible the plugs are at this stage of the process we recommend replacing them.
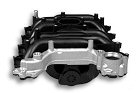
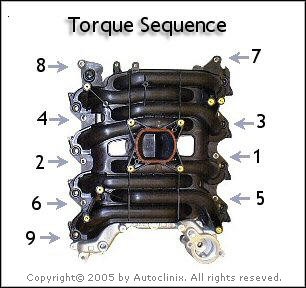
- Install manifold and torque bolts in sequence to the proper specifications
(18 lb/ft or 25nM - stamped on manifold on the 2nd intake runner from the front).
You'll need a U-joint socket adapter to get at the #7 bolt with a torque wrench. Insert and loosely
tighten the (2) long thermostat housing bolts in the manifold to be sure the thermostat housing bolt holes are
aligned before tightening the manifold. Torque the manifold mounting bolts in sequence and re-check the
torque after your first-pass. The new manifold design has built-in gaskets (O-rings) and does not
require external gaskets. Remove the (2) thermostat housing bolts used to help align the manifold.
- Re-connect the heater hose (left rear of manifold) and tighten the hose clamp.
- Replace the wire loom anchor tab you removed in step 28 and install it on the new manifold (rear left lower hole).
- Re-install the alternator (2 lower mounting bolts, 3 connectors and belt).
- Re-install the (2) temperature sensors: Green left (passenger) front, Gray right (drivers) front. Use Teflon tape on the sensor threads and use a 19mm wrench to tighten the sensors.
- Re-install the fuel rail assembly and seat all the injectors securely in their holes. I cleaned the injector tips with a paper shop towel and fired a shot of carb cleaner into each injector boss before installing the injectors. It probably didn't do any good but it made me feel better about myself.
NOTE: Each injector has an O-ring at it's base. Make sure these O-rings are in good condition and replace as
necessary. Also, each injector has a rectangular gasket that helps seal the injector connector. Make sure these are
present and in good condition before re-installing the injectors.
- Install the alternator bracket included with the new manifold kit above the alternator NOTE: the fuel rail line runs UNDER the rear tab of this bracket. You may also have to loosen and/or remove the alternator connections to get things situated properly.
- Re-install the wiring loom on left (passenger) side fuel rail and reconnect the injectors to the harness.
Re-install the small rectangular fuel injector connector gaskets as necessary. If necessary, use wire-ties to
secure the fuel rail loom cover (if the original tabs brake off during removal - as ours did).
|