|
Removal and Replacement Instructions
(steps 1-10 of 20)
- Place your jack under the frame of the car just behind the front wheel that you are going to work on first (see picture below).
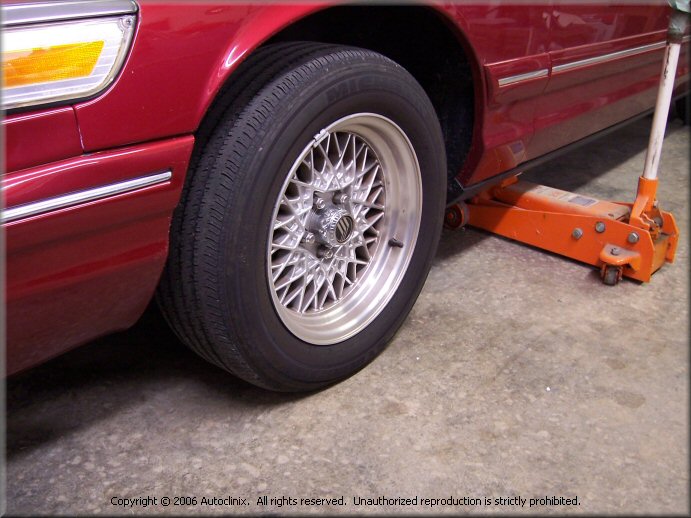
- Partially jack up the car making sure the front tire is still touching the ground.
- Using your lug wrench, loosen all five (5) lugnuts.
- Jack up the car sufficiently to raise the front wheel off of the ground (about 2"). Place a jackstand under the car
(in addition to the floor jack you are using) for added security. Don't EVER work under a car without a jackstand to support
the car in addition to the floor jack.
- Continue to loosen and remove all lugnuts and remove the wheel from the car and set aside.
- The upper ball joint connects the upper control arm to the spindle. In order to
remove the upper ball joint you have to raise and support the lower control arm. Place the 2nd floor jack
(or bottle jack) under the lower control arm to raise it slightly to compress the spring and support the
control arm during the repair. Be careful to place the jack under the lower control so that it "seats"
securely and won't slip.
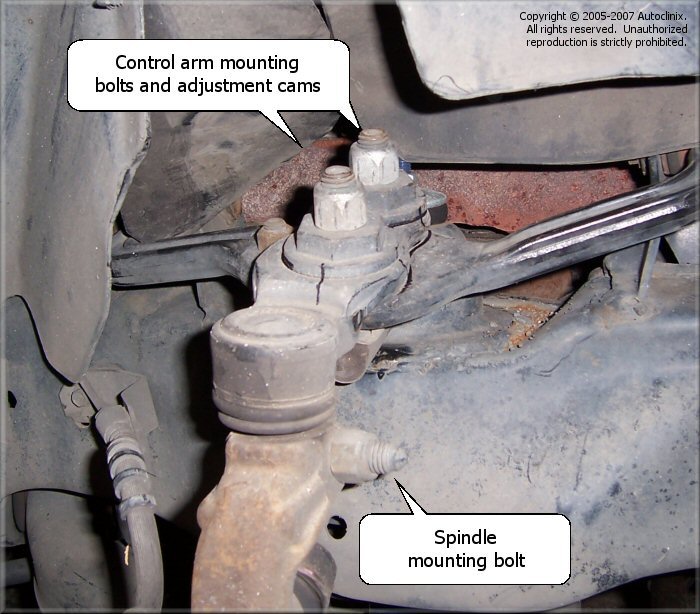
- The ball joints are secured into the spindle with a single 18mm "pinch" bolt (on the side of the spindle)
that "mates" with the recess/relief in the shaft of the ball joint. Additionally, the upper ball joint is secured
to the upper control arm with (2) large 21mm nuts and (2) adjustment "cams" (see picture below). Remove the 18mm nut
securing the spindle bolt and remove the bolt. Note that it may need some "encouragement" to come out. You can
screw the nut onto the end of the bolt (to protect the end of the bolt and the threads) and use a rubber
mallet to tap the bolt out of the spindle.
- Seperate the upper ball joint from the spindle by inserting an appropriately-sized pickle fork in between the
upper ball joint and the top of the spindle. You will need to use a hammer to drive the
pickle in sufficiently to seperate the ball joint from the spindle. Don't be afraid to hit the end of the pickle fork
fairly hard but be careful not to miss and hit something else (namely your hand). You may need to hit it several
times to break it free. On our 100,000 mile+ test car we had to beat the crap out of it but it eventually
came free.
- Once the ball joint is seperated from the spindle, mark the position of the old ball joint assembly by making an
outline around it using a pencil or a marker. This will help you install the new ball joint in a similar position.
Since we used aftermarket parts for our repair and since the new parts have a different shape/outline than the original
parts this step didn't help us very much. Nonetheless, it's a good idea to make some marks to give you some idea
of where old ball joints were situated. More importantly, make a mark on the two adjustment cams and make
a corresponding mark on the upper control arm. When you re-install these cams line up the respective marks as best
you can.
- Use a 21mm socket or wrench to remove the 2 upper mounting nuts. Remove the (2) adjustment cams and remove the
ball joint assembly from the car.

|


