|
Removal and Replacement Instructions
(steps 1-10 of 20)
- Place your jack under the frame of the car just behind the front wheel that you are going to work on first (see picture below).
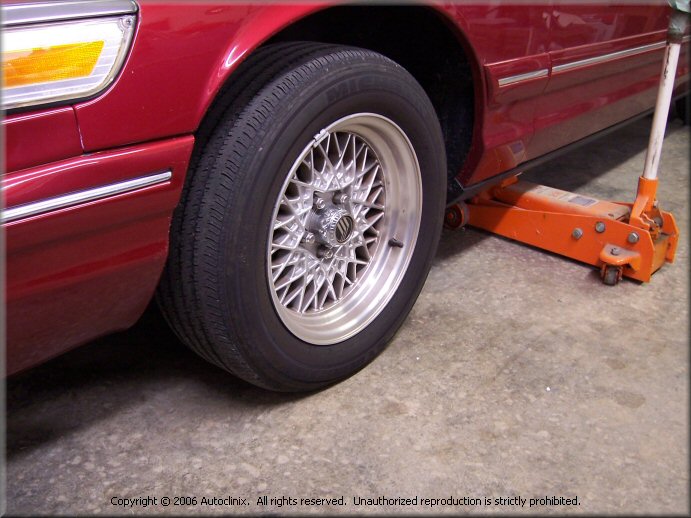
- Partially jack up the car making sure the front tire is still touching the ground.
- Using your lug wrench, loosen all five (5) lugnuts.
- Jack up the car sufficiently to raise the front wheel off of the ground (about 2"). Place a jackstand under the car
(in addition to the floor jack you are using) for added security. Don't EVER work under a car without a jackstand to support
the car in addition to the floor jack.
- Continue to loosen and remove all lugnuts and remove the wheel from the car and set aside.
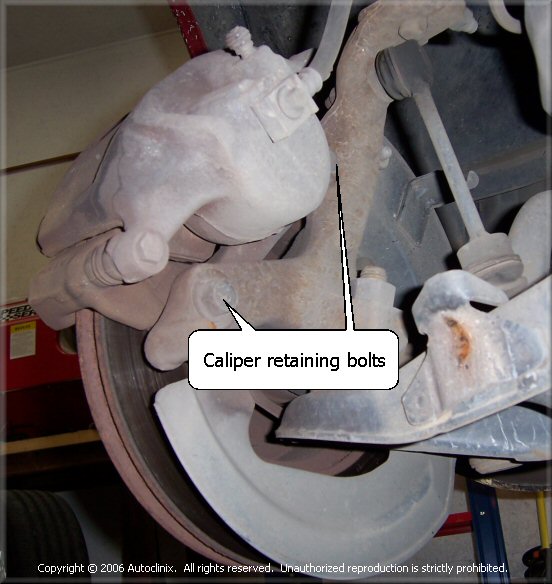
- There are two (2) 18mm retaining bolts that secure the caliper to the spindle. Remove these two bolts using
an 18mm socket and some serious muscle. They are ususally very tight. We tried to use an impact wrench but had no luck. We had to get
Big Leon to come muscle them loose. We'd suggest using a 1/2" drive, long-handled ratchet to get maximum leverage.
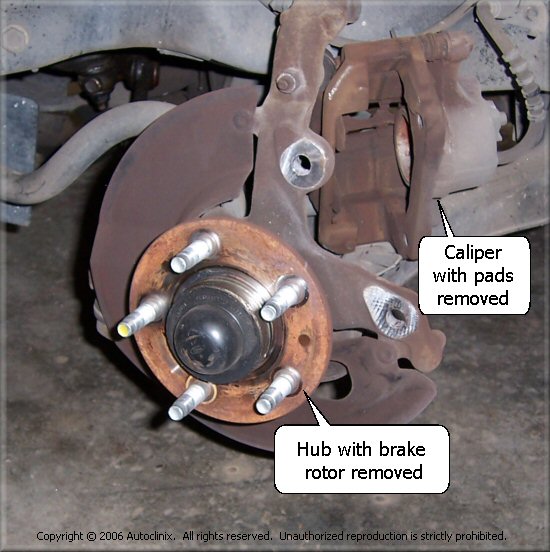
- Lift the caliper up off of the rotor. It's a good idea to secure the caliper to something and not just let it
"dangle" by the brake line. You can use a piece of wire to secure the caliper to the spindle in order to hold it out of
your way when you remove the rotor.
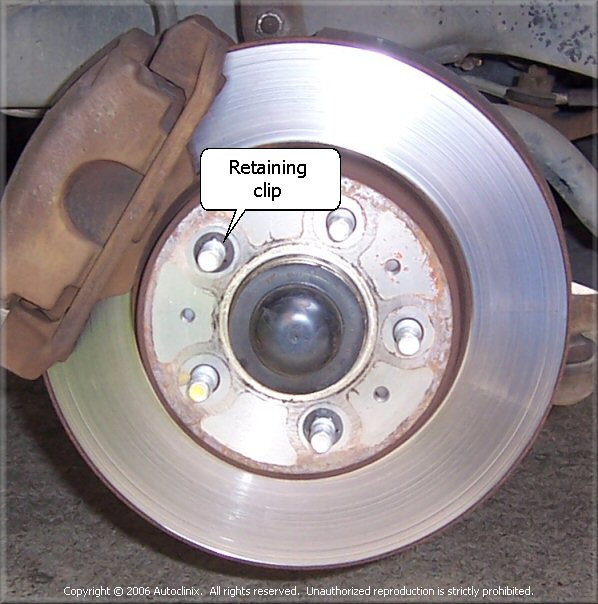
- Remove the rotor retaining clip (see picture below). This is a circular clip (sometimes erroneously called an anti-rattle clip) that helps
hold the rotor in place during assembly of the car. You'll need to remove it in order to remove the rotor from the car. We used a
small, flat-blade chisel (and a small hammer) to "split" the clip on either side and it fell right off. There may not be a clip
if your your brakes have been rebuilt previously.
- Once the caliper is removed and the retaining clip is removed the rotors simple slide off of the hub. Remove the
rotor and inspect for excessive wear and/or warpage (you can do a cursory check for warpage by laying them on a flat surface).
NOTE: As mentioned above, you should ALWAYS have your rotors resurfaced or replaced when installing new brake
pads. If your rotor is not too worn (too thin) it can be resurfaced (turned) and the original rotors can be re-used.
Some auto parts places offer this service. For example, we checked our local O'Rielly's Auto Parts and they
turn passenger car rotors for $11/ea. Since our test car's rotors were pretty old and worn we chose to replace them.
We purchased new rotors at NAPA for $29/ea. Rotor prices will range anywhere from $30 to $130 each depending on what you
buy and where you buy them. There are is a wide range in quality in replacement rotors and you should be aware not
all replacement rotors are created equal. Most low-cost replacement rotors are made in China and some are OK and
some are not. We used standard replacement rotors from NAPA and have good luck thus far. That said, if your car
is used for heavy duty service (towing, police pursuit, etc.) or if you do a lot of stop-and-go driving you should
be sure and get high-quality replacement rotors. NAPA sells three different types of rotors for this car
including a high-performance drilled/slotted rotor. O'Reilly's also sells a U.S.-made rotor that comes highly
recommended from those who have used them. Lastly, Ford OEM brake and suspension parts for these cars are often
better than the aftermarket replacement parts. You can buy genuine Ford replacement parts on-line at prices much
better than most dealers offer.
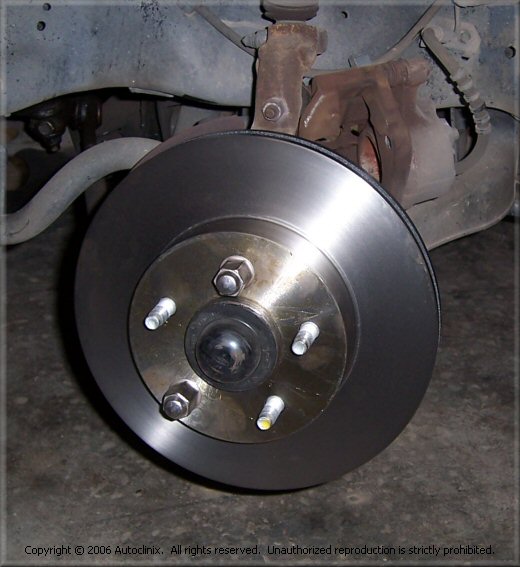
- Re-install the re-surfaced/new rotor and install and hand-tighten 2 lug nuts to help hold the rotor in place
while you work on the caliper (see picture below).
|