|
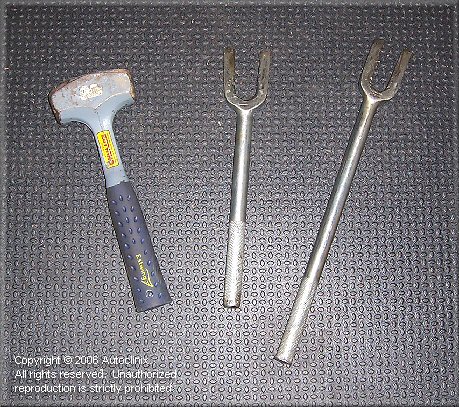
One of the less-common items you will need is a set of pickle forks (see picture below). These are used to seperate the ball
joint from the the spindle. You can find them at auto parts stores (often times on the
"cheap tool table" or at places like Harbor Freight). You'll also need a good size (weight) hammer to use the pickle
forks effectivly. We used a 3lb "drilling" hammer (kind of small, hand-held sledge hammer) and it worked well because
it has some weight to it and a large striking face. If you don't have this type of hammer (or some other heavy, large-face
hammer) your might want to get one. They make the job a lot easier and less likely that you'll accidently hit your hand,
cuss and have to get your wife to drive you to the emergency room, etc.
Replacement parts...
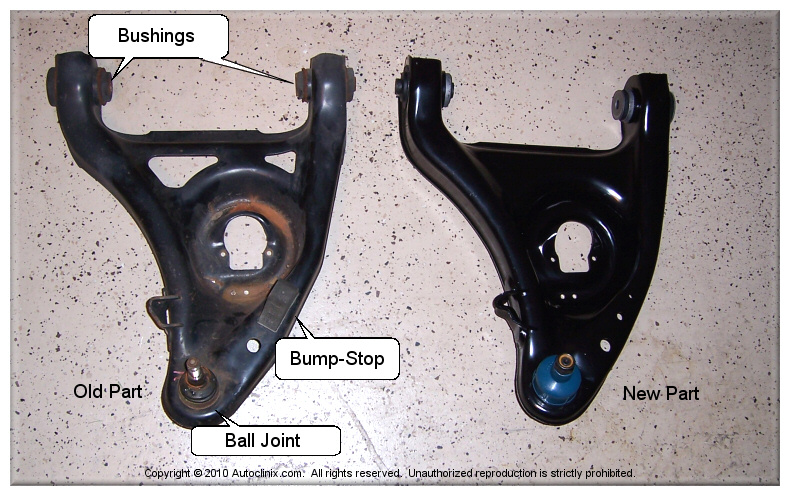
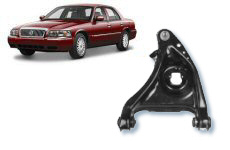
You will also need lower ball joints. There are variety of opinions on which brand(s)
of parts to use and whether or not to use OEM (Ford) parts. There are definitely a large number of knowledgable repair
people who strongly believe that many OEM Ford suspension parts are better-made and last longer than many if not most
of the aftermarket replacement parts. For example, many mechanics who service Crown Victoria police and fleet
vehicles often prefer OEM Ford parts becuase in their experience they just last longer and hold up better.
Having said that, Ford does not actually make lower ball joints (or tie rods, etc.) they source them from companies
like TRW, Moog, Dana, and others. These same companies market their parts through your local auto parts stores.
We chose to use some aftermarket lower control arm aseemblies from MevoTech which looked good and fit nicely. Our only complaints about
these parts is that the ball joints on these pre-assebled units did not have grease fittings or provisions for them and the new parts also did
not include new rubber bump-stops; we had to remove and re-use the ones from the orignal control-arms.
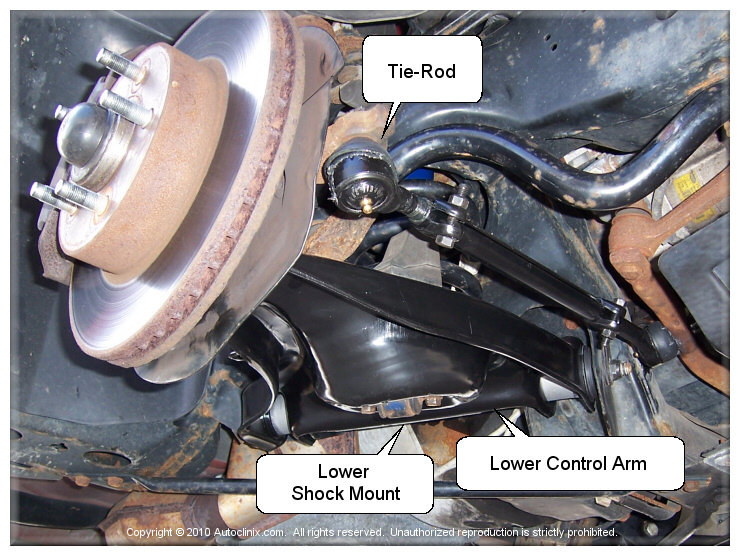
Looking Underneath...
The picture below shows some of the suspension components you'll see when you get under your car.
|

 Step-by-step guide for replacing the lower ball joints and A-arms on your Ford 1994-2004 Crown Victoria and/or Mercury
Grand Marquis. The instructions would probably also be equally applicable to a Lincoln Towncar from the same years
but this has not been verified. This is not a difficult job by any means and most folks with even modest mechanical
ability would pile right in even without instructions. That said, even if you're an accomplished do-it-yourselfer
we have documented the process and some of what you'll find in these instructions might save you some time and
headache. Although not designed to be completely exhaustive in nature (i.e., idiot-proof), anyone with even the
most modest mechanical skills and some relatively common tools should be able to readily accomplish the procedure
described. That said, your front suspension is a critical componenet of keeping your car safe and roadworthy.
If you read through the described procedure before beginning and get concerned about your skills to accomplish
the task then take your car to a reputable repair shop (if you can find one) and have them replace your upper ball joints with quality
replacement parts. If you do decide to take on this procedure yourself please drop us a line and give us some
Step-by-step guide for replacing the lower ball joints and A-arms on your Ford 1994-2004 Crown Victoria and/or Mercury
Grand Marquis. The instructions would probably also be equally applicable to a Lincoln Towncar from the same years
but this has not been verified. This is not a difficult job by any means and most folks with even modest mechanical
ability would pile right in even without instructions. That said, even if you're an accomplished do-it-yourselfer
we have documented the process and some of what you'll find in these instructions might save you some time and
headache. Although not designed to be completely exhaustive in nature (i.e., idiot-proof), anyone with even the
most modest mechanical skills and some relatively common tools should be able to readily accomplish the procedure
described. That said, your front suspension is a critical componenet of keeping your car safe and roadworthy.
If you read through the described procedure before beginning and get concerned about your skills to accomplish
the task then take your car to a reputable repair shop (if you can find one) and have them replace your upper ball joints with quality
replacement parts. If you do decide to take on this procedure yourself please drop us a line and give us some