|
Removal and Replacement Instructions
(steps 1-10 of 20)
- Place your jack under the frame of the car just behind the front wheel that you are going to work on first (see picture below).
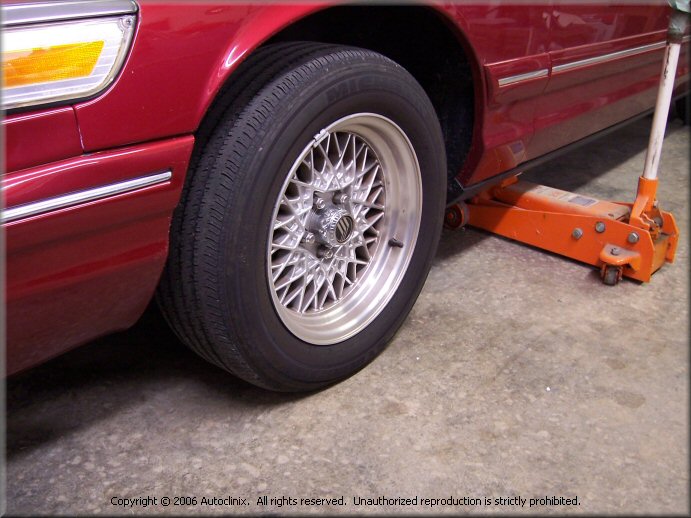
- Partially jack up the car making sure the front tire is still touching the ground.
- Using your lug wrench, loosen all five (5) lugnuts.
- Jack up the car sufficiently to raise the front wheel off of the ground (about 2"). Place a jackstand under the car
(in addition to the floor jack you are using) for added security. Don't EVER work under a car without a jackstand to support
the car in addition to the floor jack.
- Continue to loosen and remove all lugnuts and remove the wheel from the car and set aside.
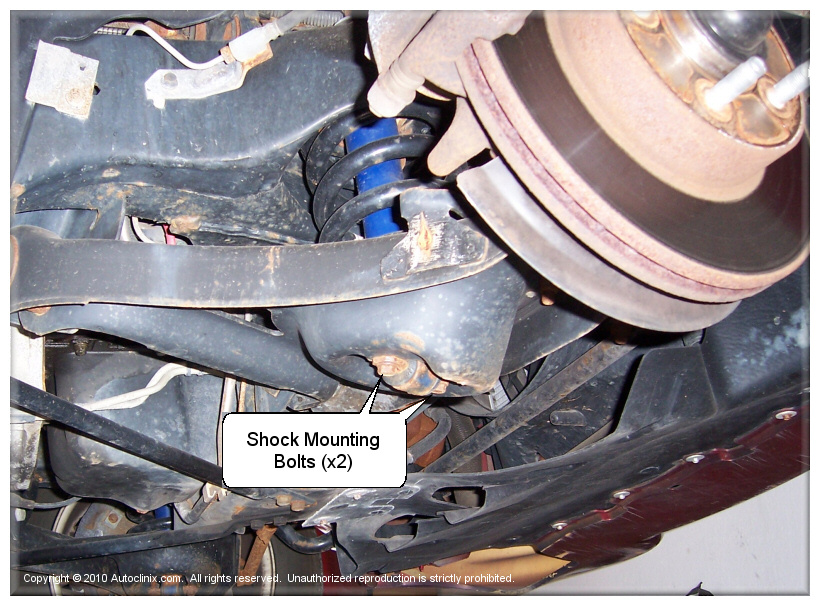
- Remove the (2) lower shock mounting bolts using the 13mm socket or wrench (see picture below).
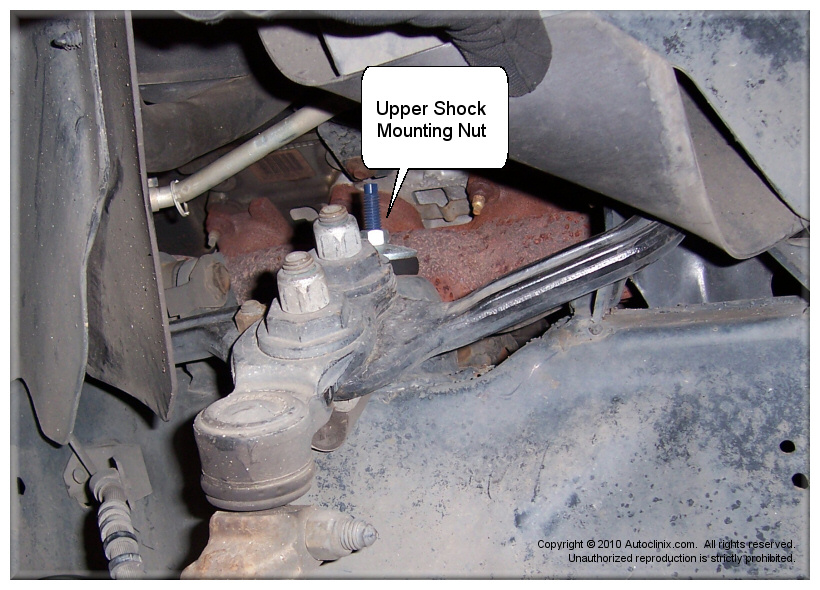
- Remove the upper shock mounting nut using a 14mm wrench. Use an adjustable wrench to hold the shock mounting shaft (flat sides) while removing the nut (see picture below).
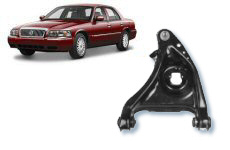
- The lower ball joint connects the lower control arm to the bottom of the spindle. In order to
remove the lower control arm you have to seperate the ball joint from the spindle. Place the 2nd floor jack
(or bottle jack) under the lower control arm to raise it slightly to compress the spring and support the
control arm during the repair. Be careful to place the jack under the lower control so that it "seats"
securely and won't slip.
The ball joints are secured into the spindle with a single 24mm nut on top of the ball joint itself.
With the lower control raised and fully support by the jack, remove the 24mm nut on the top of the lower ball joint and
lubricate (oil, WD-40, grease, etc.) the threads on the ball joint shaft. PUT THE NUT BACK ON THE BALL JOINT screwing it on so that the top of the ball joint shaft is at least
level with the nut if not above it (leaving about 1/2" gap between the nut and the top of the spindle (see picture below).
This will allow you separate the ball joint from the spindle and use the nut as a "catch" when it separates. Why did we remove it only to put it back on you ask?
You need to remove it to lubricate the shaft to make sure you can easliy remove the nut in a later step. Once the ball joint is separated it can be hard to remove this nut as the
ball joint will just spin in place when you try to turn it (ask us how we know).
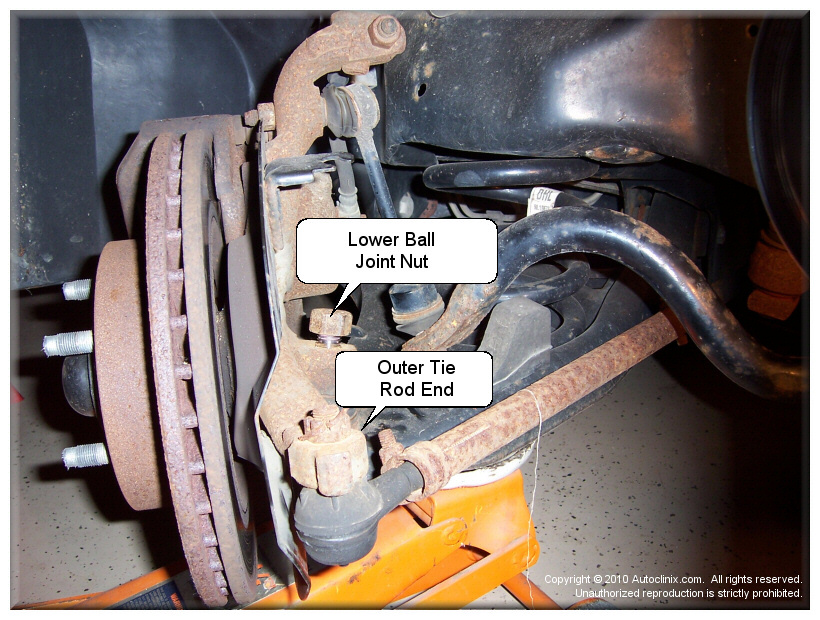
- Outer tie rod: remove the cotter pin and crown nut (19mm) on the outer tie rod end (see picture above) and disconnect the tie rod from the spindle (using a pickle fork if necessary - just be careful not to damage the tie-rod end).
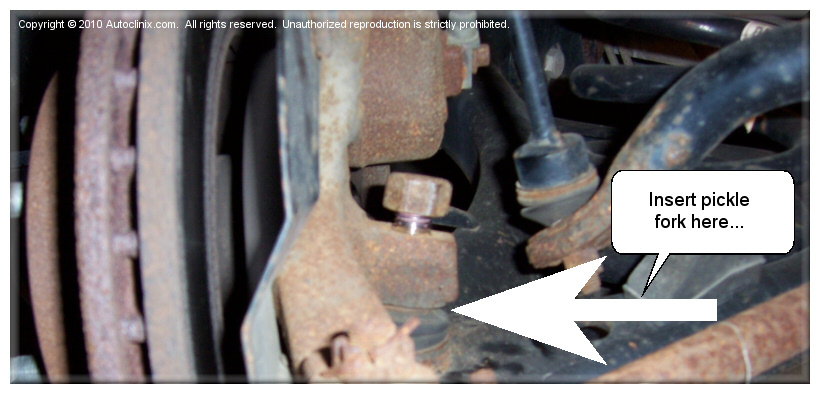
- Carefully lower and remove the jack supporting the lower control arm. Separate the lower ball joint from the spindle by inserting an appropriately-sized
pickle fork in between the lower ball joint and the bottom of the spindle (see picture below). You will need to use a hammer to drive the
pickle fork in sufficiently to seperate the ball joint from the spindle. Don't be afraid to hit the end of the pickle fork
fairly hard but be careful not to miss and hit something else (namely your hand). You may need to hit it several
times to break it free. On our 100,000 mile+ test car we had to beat the crap out of it but it eventually
come free. When it does, the lower control arm will drop down and rest on the ball joint bolt that was loosened earlier.
|