|
Removal and Replacement Instructions
(steps 11-20 of 20)
- Use the floor jack (or bottle jack) to raise the lower control sufficiently to support and then remove the ball joint
nut that was previously removed, lubricated and replaced. It *should* come off easily with minimal cussing due to the extra
care taken earler.
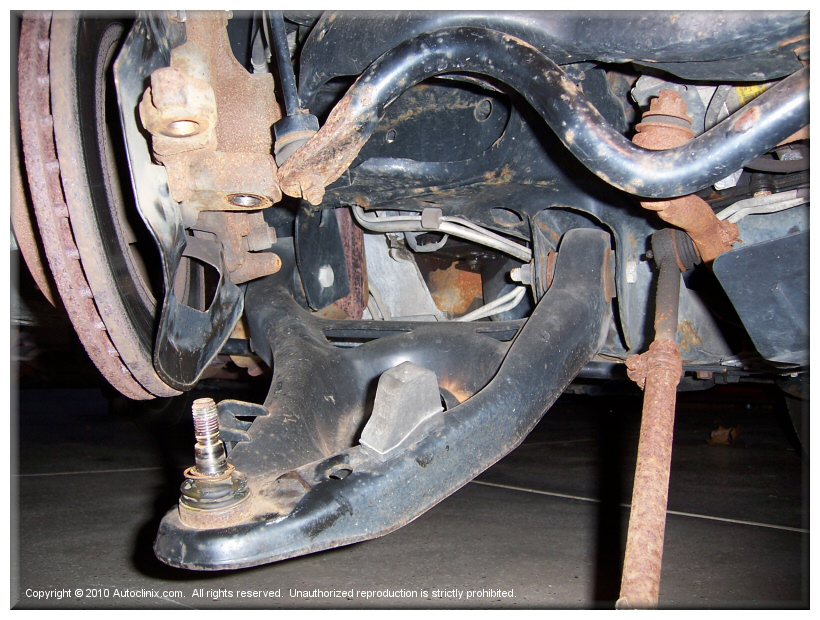
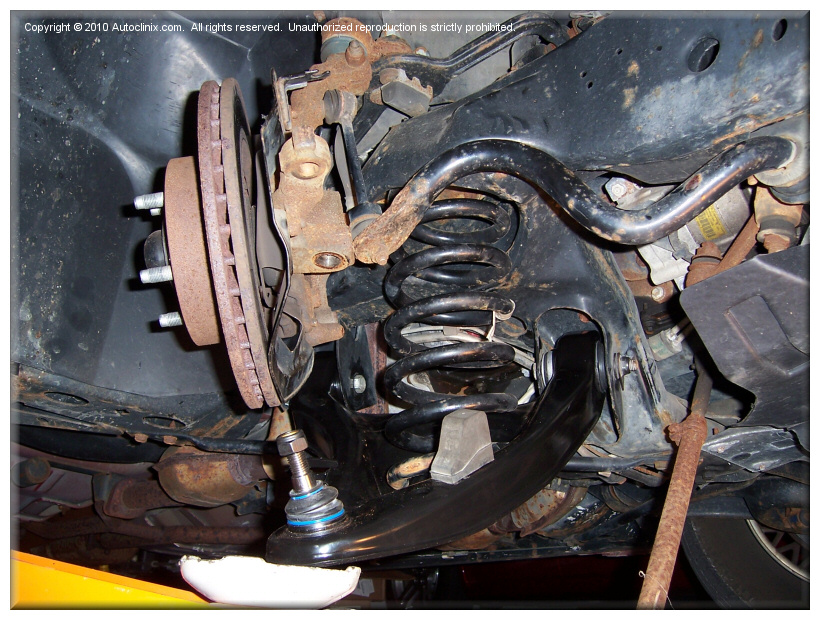
- Once the ball joint nut is removed SLOWLY lower the control arm using the floor jack. This is where a floor jack is much
preferred as they are easier to control (from a distance). The lower ball joint should release and the lower control arm should drop as the jack is
lowered. Hopefully at this point your looking at something similar to the picture below (note that the spring is removed in the picture below)...
- The next step is to remove the spring. After the step above the spring should be under minimal tension can be removed without a spring compressor. Press down
on the lower control as far as possible and reach in a remove the spring. You may need to raise the car higher in order get sufficient clearance to remove
the spring.
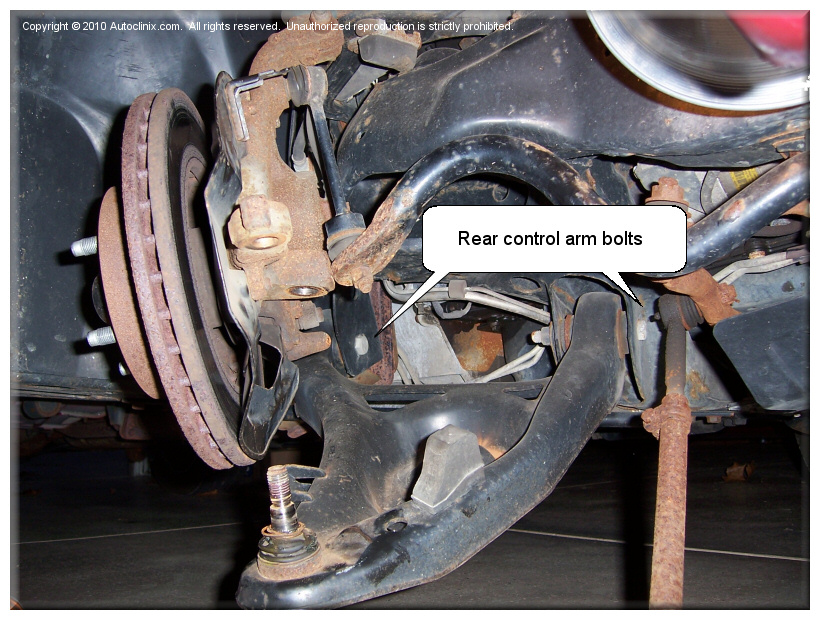
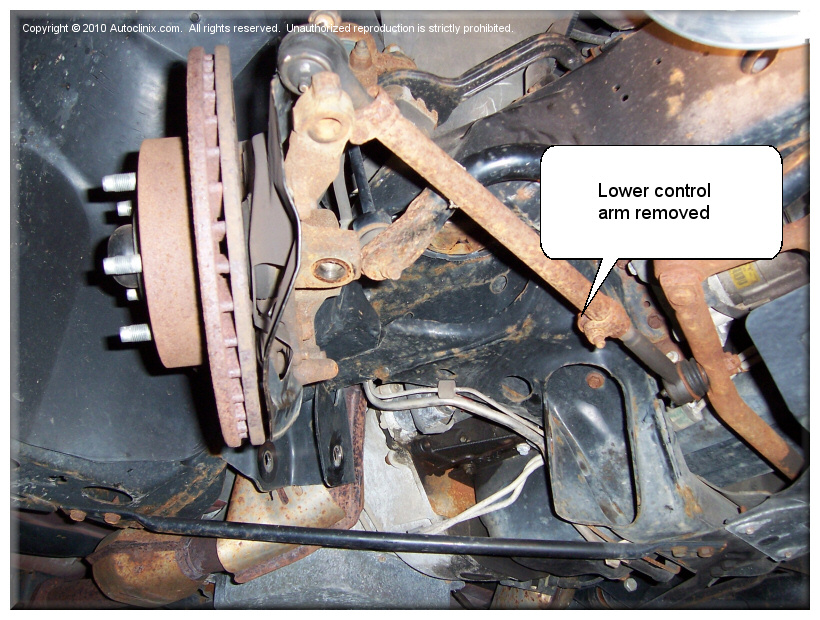
- Remove the two (2) 21mm bolts securing the rear of the control arm (see pictures below). The nuts have a tab on them to prevent them from turning so you should only need one wrench. Once the nuts are removed
slide the bolts out and remove the lower control arm assembly.
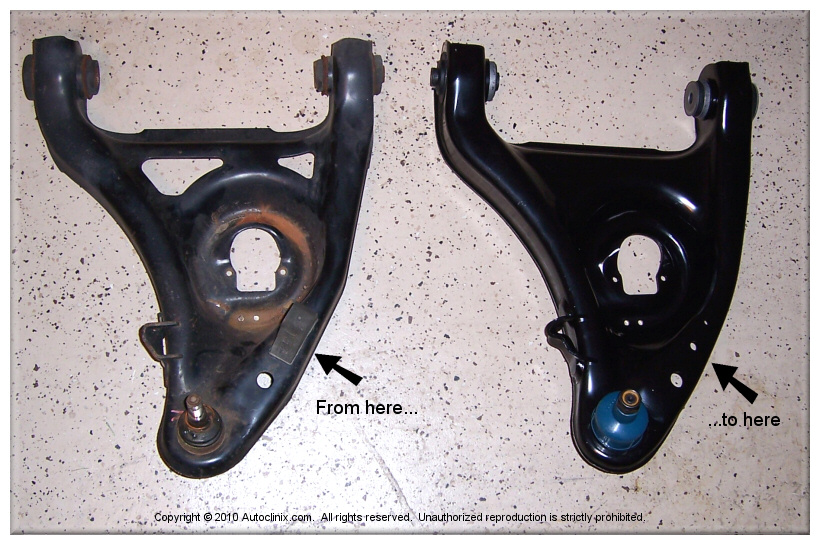
- If necessary, unbolt and transfer the rubber bump-stop from the original control arm to the new control arm assembly (see picture below). If your new ball joints have grease fittings
now would be a good time fill them with high quality grease. You will need a grease gun to do so.
- It's time to put things back together. Install the new control arm assembly by inserting the rear mounting bushings into the mounting tabs. You may need to pry
apart the mounting tabs in order to insert the new control arm assembly as they get pressed closer together when the control arm bolts are tightened.
You can use a pry bar or other persuasive device such as a drilling hammer (as we did). Once in, insert the two (2) mounting bolts and tighten to 140 ft-lbs of torque
using a torque wrench. If you don't have a torque wrench you can probably borrow one from Autozone's Loan-A-Tool program or similarly from Advance Auto, etc.
- Re-install the spring making sure that the upper spring mount damper (rubber gasket) is in place. Note which way the spring goes in and be sure and install it rigth-side up.
- Place the floor jack under the control arm and slowly raise it making sure that the lower ball joint shaft lines up with and slides into the lower part of the spindle (see picture below - NOTE: remove
ball joint nut before raising control arm). Once fully inserted,
install the lower ball joint nut on the ball joint shaft and tighten to 80-100 ft-lbs using a torque wrench.
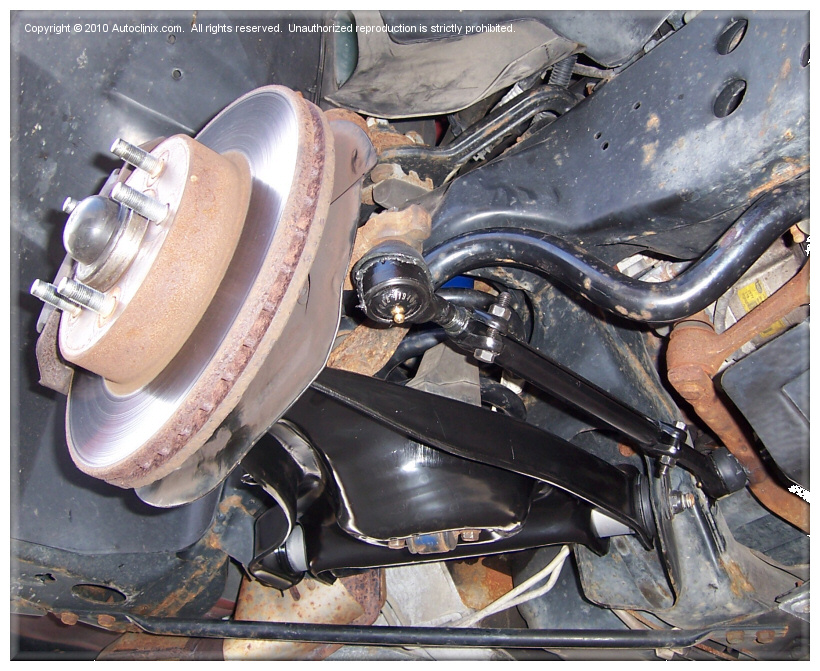
- Re-install the outer tie rod end into the spindle. Replace crown nut and tighten to 35-45 ft-lbs. Replace cotter pin in crown nut. You may notice in the picture below
that we replaced the tie rods during this repair. The winter weather and road salt had taken its toll so we opted to replace them given that this was an opportune time to do so.
- Re-install the shock . Insert the shock up through control arm making sure to install the upper mounting bushings before doing so. Install the top bushing and washer. Tighten the top bolt sufficiently
to compress the upper bushings (but don't crush them). Install and tighten the lower two (2) shock mounting bolts to 35-45 ft-lbs. Re-mount the wheel, tighten the lug nuts and your done with this side.
Repeat the process for the other side of the car. Once completed, TAKE YOUR CAR IN FOR A FRONT END ALIGNMENT.
Anytime you change ball joints, tie rods, control arm bushings, etc., you NEED to have the front end re-aligned.
Failure to check the front end alignment can cause the car to vibrate, pull to one side and can cause premature/excessive tire wear.
Don't be a dufus and skip this step. Your Momma taught you better. If you have any problems or run into any issues please
refer to the Troubleshooting section for this repair.
Congratulations! You just replaced your lower ball joints and control arms and saved yourself some money (and gained the satisfaction
of doing it yourself). After your wash your hands and drink an adult beverage please drop us a line and give us some
feedback on the content of this site. We're always trying to improve our content and we love
getting feedback from fellow Do-It-Yourselfers
|