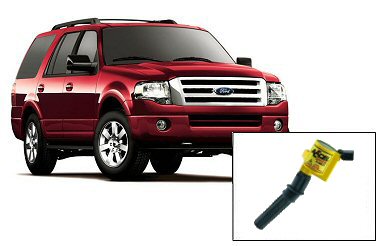
Ford F-150 / Expedition /
Lincoln Navigator
Coil and Spark Plug
Replacement
Introduction
Does your Ford F-150 / Expedition / Lincoln Navigator run rough? Has the mileage dropped? Is your check engine light on? It's quite possible that the problem is a bad
ignition coil, coil boot, or spark plug. Like most modern Fords ('98 model year and up) the ignition system on these vehicles has an individual ignition coil for
each cylinder (called the Coil-On-Plug or COP System) and they are a common failure item. In fact pretty much every Ford model equipped with a 4.6L and 5.4L engine
(Mustang, Crown Victoria, Lincoln Town Car, E-150 van, etc.) made since 1998 all use the COP system and thus these repair instructions apply to these models as well.
Our test vechile is a 2003 Ford Expedition and it's "Check Engine" light was lit and we had a rough idle as well. After checking the diagnostic code with an inexpensive
OBDII code reader (we used an Acton CP9550 pocket code reader) we then referred to the Autoclinix
Ford OBDII PCM Trouble Codes page and found out we had a "cylinder misfire" code. We decided to find out
what was causing the problem, repair it, and show you to do it too. Not to worry, this is a relatively easy repair. You can replace a single coil in less than 30 minutes
or do a full coil and spark plug replacemnt (like we did) in about 2 hours. Dealers will charge $500+ for a full tune-up/repair but you can do it for less than $190.
If you do decide to take on this procedure yourself please drop us a line and give us some
feedback on the content of this site. We're always trying to improve our content and we love
getting feedback from fellow Do-It-Yourselfers
Getting Started
A cylinder misfire is most often caused by 1 of 3 things: 1) a bad coil boot (the rubber boot with a spring inside of it that connects the coil to the top of the spark plug),
2) a bad ignition coil, 3) or a bad spark plug. Once you determine you do have a misfire and which cylinder it is you have the following options for repair (from cheapest to
most expensive):
Replace the coil boot for that cylinder only ~$8
Replace all the coil boots (all 8 cylinders) ~$30
Replace the single coil for the "bad" cylinder ~$35
Replace the single coil & spark plug for the "bad" cylinder ~$40
Replace the coils and spark plugs for ALL cylinders ~$175
The boots do go bad as they get dry, cracked, etc., and they sometimes allow the spark to short to the metal on the cylinder head instead of through the spark plug like it's
supposed to. When that happens your engine "misfires" and if it does it enough times it will cause the "Check Engine" light to come on. In our experience it is more likley that
the ignition coil itself is bad (or intermittent) and that the bad coil is the cause of the misfire and thus will need to be replaced.
Once we confirmed we did indeed have a cylnder misfire (on cylinder 3 in our case) we decided to replace all the coils and spark plugs on our test vehicle since our vehicle had over
100,000 miles and since our mileage had been dropping for some time. We did all of this for about $180 and now our truck runs great and the mileage is back up to where it was
when the vehicle was new (maybe better).
A word of caution...there are some who believe that replacing just one coil is a bad idea as it will lead to the premature failure of the other coils. In other words, if
you replace a single coil one of the other coils will fail shortly thereafter...then another...then another...etc., leading you to replace all the coils anyway. We have seen
this happen a few times ourselves and have spoken to many mechanics who claim this is more than an urban legend and is indeed a known problem with the Ford COP system. We can't say
for sure but we did decide to replace everything (all new coils and spark plugs) and you might want to consider doing the same if it's been a while since you Ford has had a proper tune-up.
Parts and Tools...
For this repair you'll need the following parts and tools:
Socket wrench (a standard 3/8 drive socket wrench and a "stubby" wrench)
Socket extensions (we used a 4" and 7")
7mm socket
8mm socket
11mm socket
5/8" spark plug socket
Spark plug gap gauge
New coils
New spark plugs
Removal and Replacement Instructions
(steps 1-10 of 10)
Disconnect the negative battery cable. It's always a good idea to disconnect the battery when working on anything connected to the electrical system of the car (which the coils
are). We confess we don't always perform this step since it's such a simple and quick repair and presents little risk to the electrical system. That said, do as we say, not as we
do.
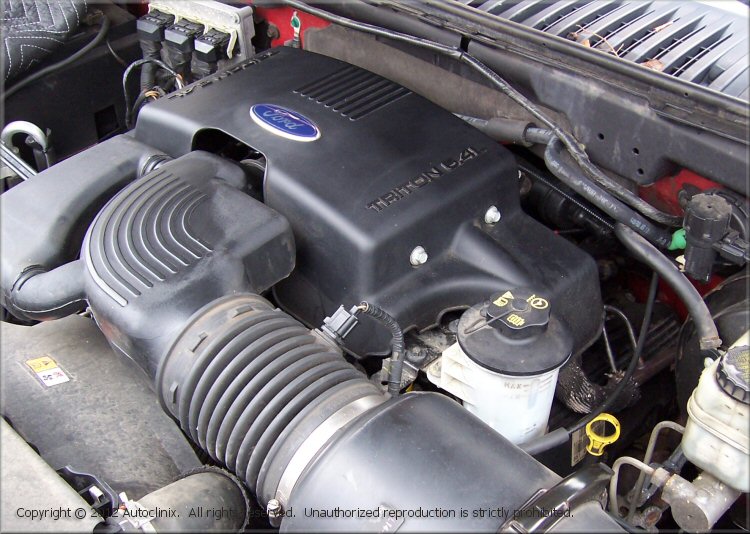
The coils are located on top of the engine. If your vehicle is so equipped, remove the cover from the top of the engine by using an 11mm socket to remove the (2) bolts on the
dirvers side of the cover. Once the bolts are removed, lift the cover up and off and set it aside.
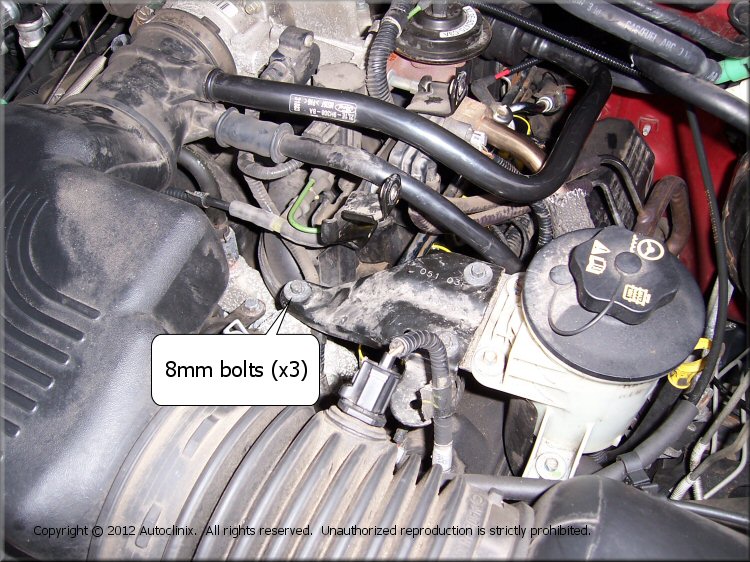
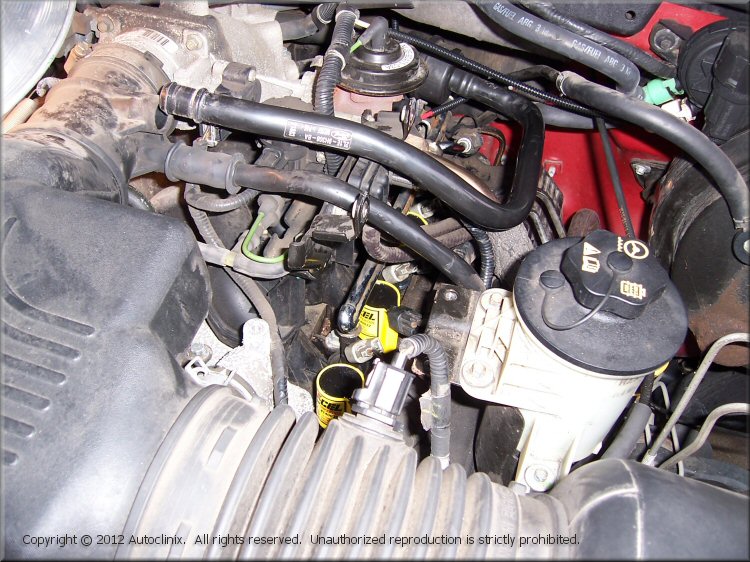
If you are replacing the coils/plugs on the drivers side of the engine then you'll also need to remove the bracket that secures the power steering reservoir. It is held on by (3)
8mm bolts (see picture below). Use the 8mm socket to remove the bolts and then remove the bracket and set it aside.
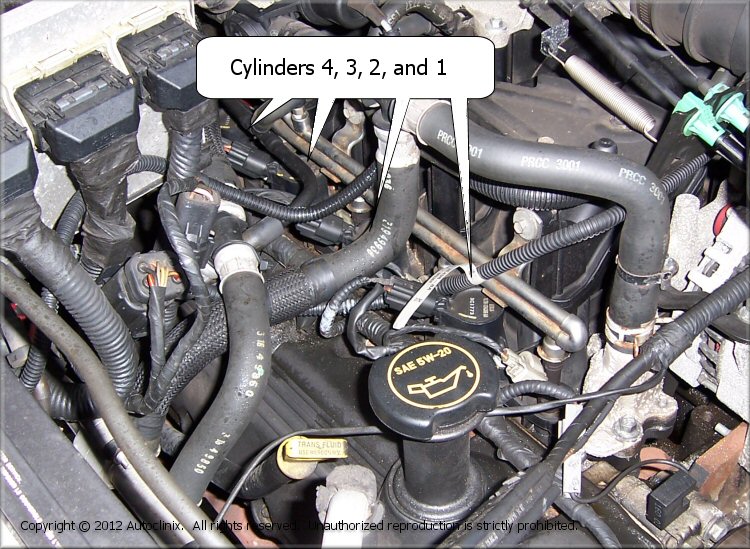
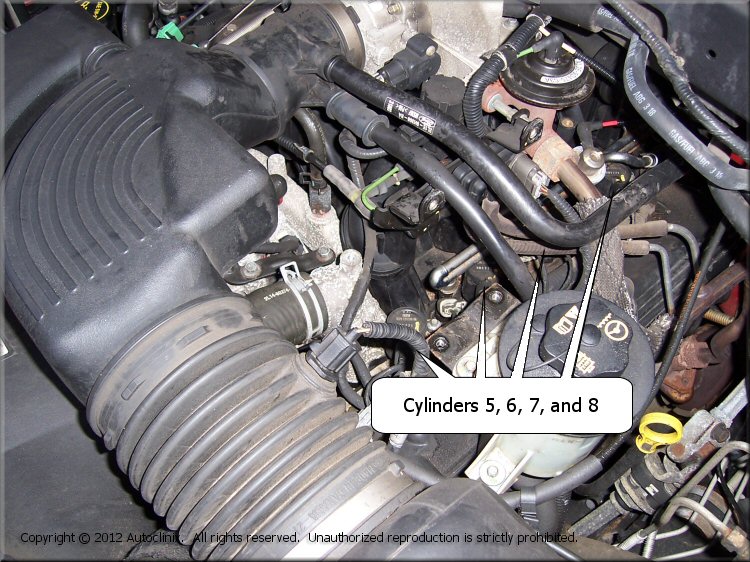
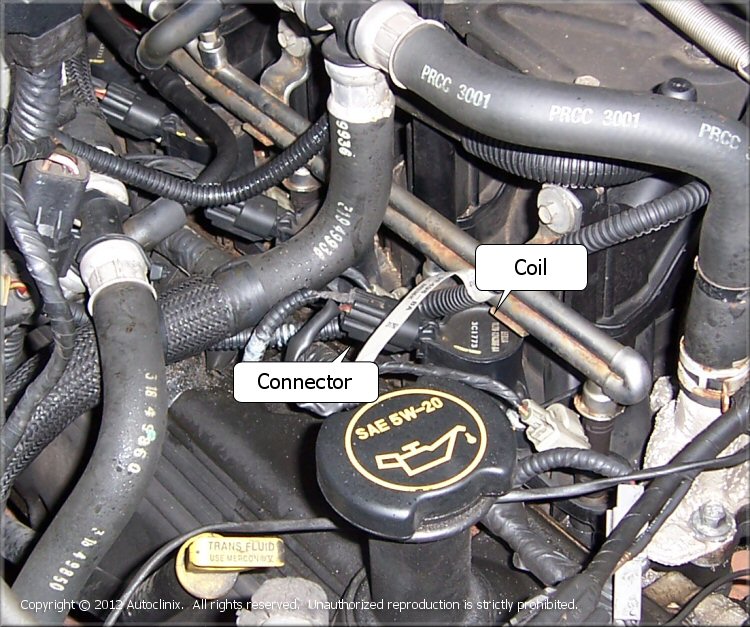
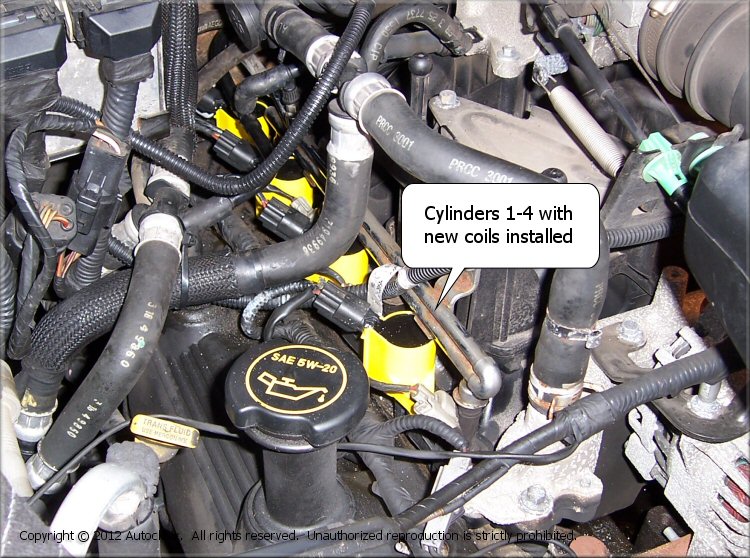
The coils are held in place with a 7mm bolt that screws into the top of the intake manifold. If you're only replacing a single coil make sure you replace the correct one.
The cylinders are numbered 1-8 starting with the front cylinder on the passenger side (cylinders 1-4) and cylinder 5 being the first cylinder on the drivers side front (see picture below).
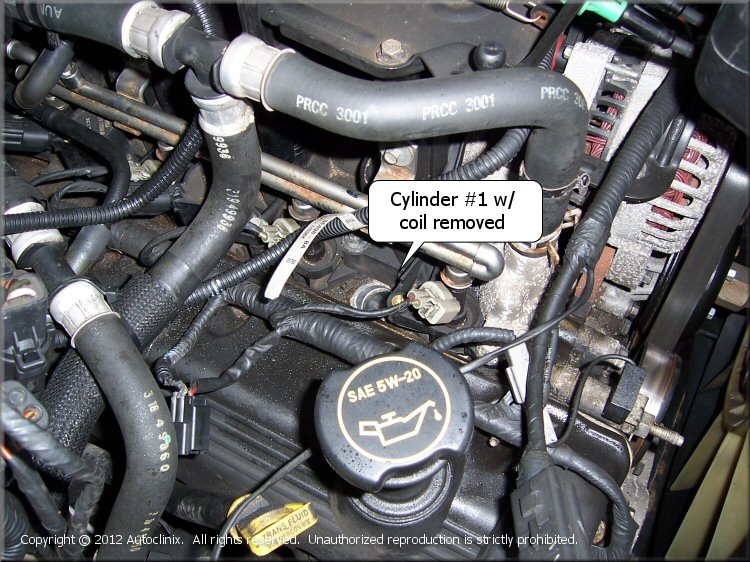
To remove the coil, unplug the coil from the wiring harness connector by pushing on the side tab. Remove the 7mm bolt and lift the coil off of the spark plug.
Once the coil is removed you can now have access to remove the spark plug if you want to replace them (we did). The spark plugs sit deep down in a "well" (see picture below)
so you'll need an extension for your ratchet and a good spark plug socket (do NOT use a regular socket as it may break the spark plug).
When removing the spark plug be careful to make sure the socket is all the way down on the plug and that you hold the ratchet straight as you apply force to remove the plug. As a precaution,
we sprayed each plug well with PB Blaster and let it soak for a few hours before attempting to remove the plugs. We're not sure it helped but it made is us feel better. In any event,
all the plugs came out undamaged and our spark plug replacement was succsessful. Our plugs were indeed worn after 100,000+ miles of use and needed replacing.
Before installing the new spark plug check to make sure the gap is within specs. The factory recommended spark plug gap is listed on the the emissions sticker under the hood (on our 2003
Expedition it was on the front radiator support).
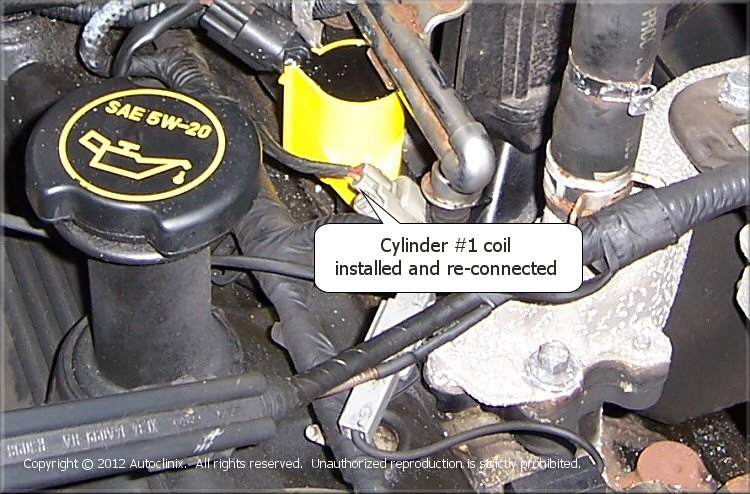
To install the new coil, place the coil boot into the spark plug well and push the coil all the way down. You should feel the coil boot engage the spark plug and the coil should
go all the way down until touches the top of the manifold. The coil may feel a little "wobbly" even when it's fully seated but make sure it's pushed down all the way. Once it is, line
up the coil mounting hole with the the threaed boss on the manifold and re-install the 7mm screw to secure the coil.
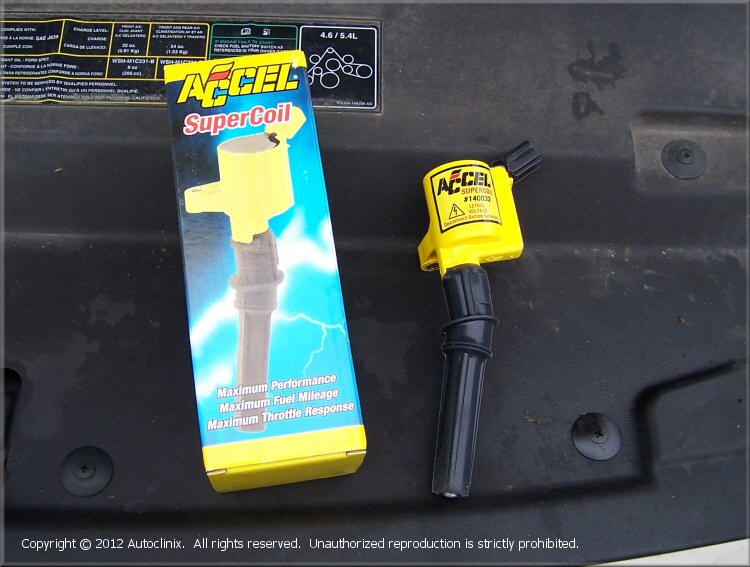
NOTE: We chose to use Accel brand coils purchased from Amazon.com because they were significantly less expensive than every other brand
and Amazon was cheaper than our local parts store for the same part. We don't know if the Accel parts will hold up as well as a say a Motorcraft part but for the price we decided to give them
a try. So far, our Expedition is running better than ever, seems more responsive, and the mileage is greatly improved.
The process for the remaing coils and spark plugs is the same with the only exception being that that the rear-most cylinders (especially on the passenger side) are a royal pain to
get to. You'll end up doing much of the work on them by "feel" since you can't see much back there. Be patient and take your time and you should be able to replace these
coils/plugs with minimal cussing.
Replacing the coils on the drivers side is much the same process as noted above. We did have some difficulty getting a ratchet on the coil attachement screw for cylinder #7 so
we ended up using a 7mm box wrench to remove and replace the coil screw. It was slow but worked.
NOTE: You may also notice in some of the pictures that we temporarily disconnected things like the PCV lines in order to better get at some of the coils. It's OK to disconnect stuff just remember to re-connect it when you're done. Also, if you disconnect any of the fuel injector connectors (either on purpose or because you mistakenly thought it was a coil connector)
be sure and re-connect all of them before re-installing the engine cover.
Once all the new coils and plugs are installed, all the coil connectors are re-connected and any other things you disconnected are re-connected, you can re-install the power steering
reservoir bracket using the (3) 8mm bolts you removed earlier.
Before re-installing the engine cover it might be a good idea to test your work at this point. As such, re-connect the battery cable and crank the engine after making sure all parts,
tools, etc., are clear and that it's safe to crank the engine. If all went according to plan your engine should crank right up and run smoother than it has in a long time. if it doesn't, check the troubleshooting page for this repair.
If all is running well, re-install the engine cover by pushing it down on the engine cover mounts and re-installing the(2) 11m bolts on the passenger side.
Congratulations! You just gave your vehicle a full tune-up and saved yourself some money (and gained the satisfaction of doing it yourself). After your wash your hands and drink your
favorite beverage please drop us a line and give us some
feedback on the content of this site. We're always trying to improve our content and we love
getting feedback from fellow Do-It-Yourselfers