Lincoln Town Car
Window Regulator
Repair / Replacement
Introduction
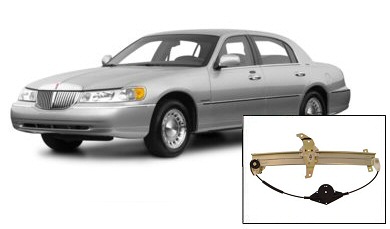
If you're the proud owner of a 1990 or later Lincoln Town Car there's a good chance you've had one or more of your power windows fail to work at some point.
Whether it got stuck up, down, or somewhere in between the usual culprit is a broken window regulator. Whether it's a bad regulator or bad motor these repair intstructions
will show you how to fix both scenarios. When we purchased our test vehicle it had 3 windows that weren't working so we've gained quite a bit of experience fixing this
particular problem. If your Town Car has this same problem, not to worry, this is a relatively easy repair. You can replace a window regulator in about an hour if you
get the parts and tools in place ahead of time and follow these step-by-step instructions. Dealers will charge $250+ for this repair but you can do it for less than $60.
If you do decide to take on this procedure yourself please drop us a line and give us some
feedback on the content of this site. We're always trying to improve our content and we love
getting feedback from fellow Do-It-Yourselfers
Getting Started
If your Town Car's power window is not working it's most likely a broken window regulator or a bad window motor. How can you tell which one it is?...
If the window motor makes a sound when you press the power window button but the window does not move it's most likely a regulator. If the window glass won't
stay up by itself (slides down or falls) it's most definitely a bad regulator.
If the window motor does NOT make a sound when you press the power window button the power window motor is possibly bad.
Parts and Tools...
For this repair you'll need the following parts and tools:
Phillips and flat-blade screwdrivers
Socket wrench (a "stubby" 3/8 drive socket wrench is ideal)
Socket extension (we used a 3")
10mm socket
T30 Torx bit
Drill and drill bits
Center punch (automatic style preferred)
Large pop rivet tool
Needle-nose pliers
Duct tape or similar tape for holding up the window during the repair
White lithium grease (optional but recommended)
New window regulator (drivers-side front, passenger-side rear, etc.)
New window motor (only if needed)
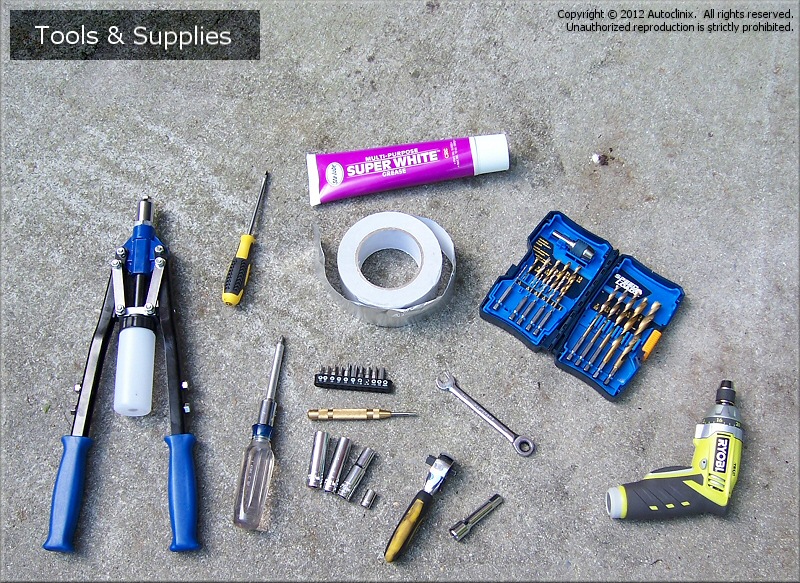
One of the less-common items you will need is a large pop rivet tool (see picture above and Amazon ad below). These are used to re-attach the the window glass
to the regulator using the large pop rivets supplied with the replacement regulator. They are easy to use and make the job much easier and quicker. The pop rivet
tools are less than $20 and can be used for a variety of other repairs. You'll also want to buy an inexpensive automatic center punch. These are a simple,
spring-loaded punch that make it easier to remove the old rivets from the window regulator and window motor.
Note that you can do this repair without the pop rivet tool and instead use standard bolts and lock nuts (with nylon washers built-in) instead of pop-rivets. We went this route on the first
window we repaired but chose to use the pop-rivet method on subsequent repairs and compare the two methods. The pop-rivet method is much easier, faster, and well worth
the $18 investment in a pop-rivet tool; especially if you ever need to do this repair again. In our experience, if you own a Town Car and keep it long enough you WILL do this repair
again.
Removal and Replacement Instructions
(steps 1-10 of 10)
Disconnect the negative battery cable. It's always a good idea to disconnect the battery when working on anything connected to the electrical system of the car (which the coils
are). We confess we don't always perform this step since it's such a simple and quick repair and presents little risk to the electrical system. That said, do as we say, not as we
do.
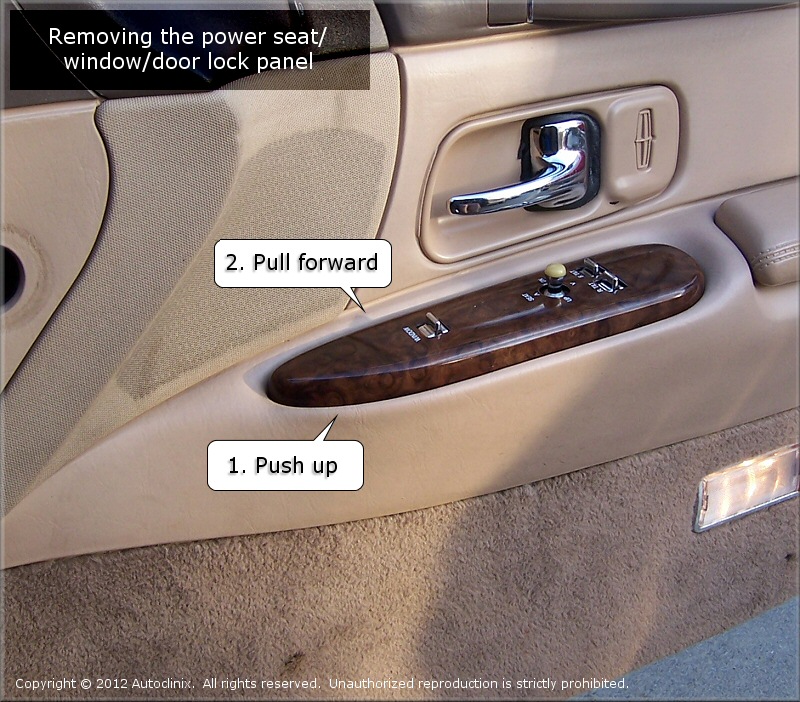
Remove the power window control panel by gently prying up the front of the panel them pulling it forward. Use a Phillips screwdriver to the remove screws that retain the wiring harness to
the control panel. On some newer model Town Cars (ours was a 1997) these connectors "snap-in" and thus there are no screws to remove.
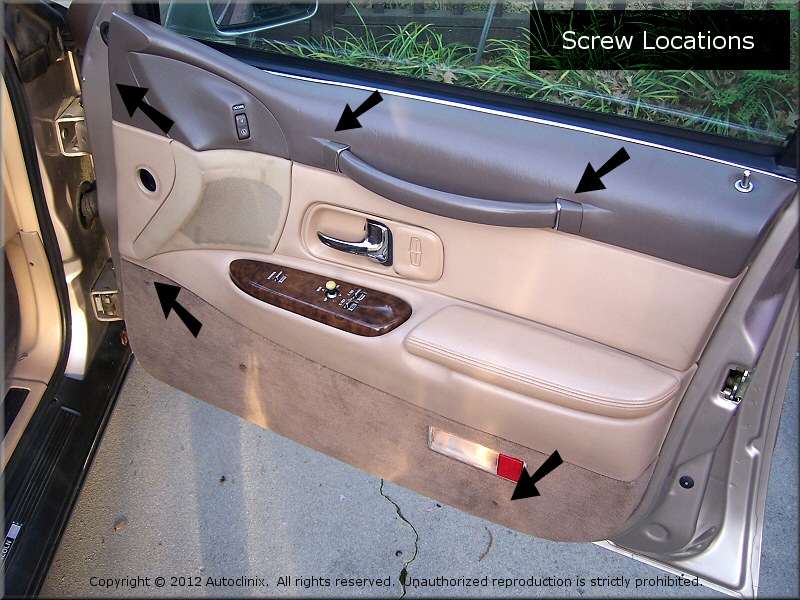
Remove the door panel to gain access to the window regulator. Use a Phillips screwdriver to the remove (5) screws that retain the door panel (see pic below). The (2) screws
that attach the door pull strap to the door are behind covers that you can remove by gently prying them off (from the underside) with a flat-blade screwdriver. Starting at the bottom edge,
pull the door panel away from the door to detach the door panel from the door. Lift the door panel up and off of the door.
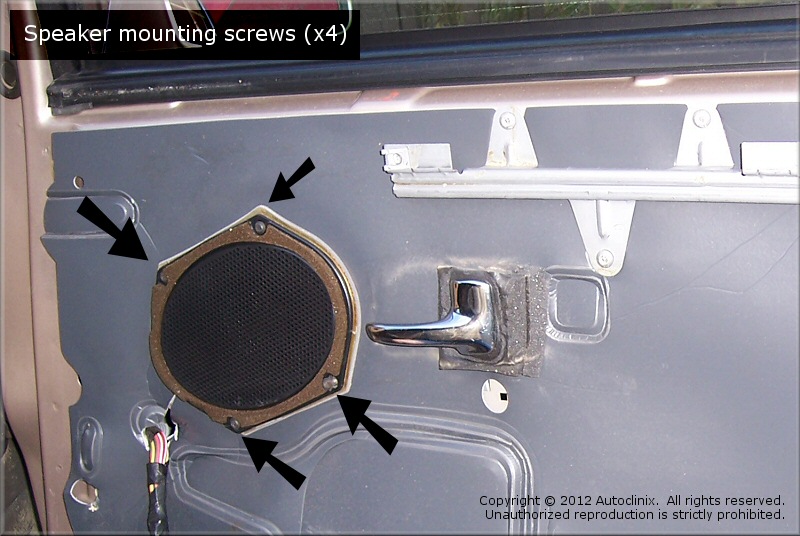
Remove the speaker from the door by removing the (4) Phillips screws. Unplug the speaker conector and set the speaker aside. Some people say this step is not necessary but it sure
made it easier for us to get at the window motor and regulator.
Gently peel back the moisture barrier starting at the bottom and fold it up as you go. We used some duct tape to hold the barrier up and out of our way during the repair.
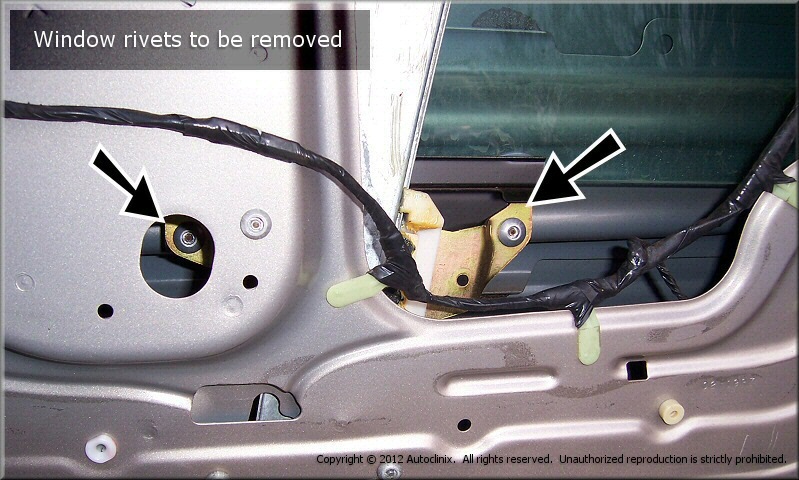
There are (7) rivets and (2) 10mm nuts that have to be removed (see picture below). The window regulator itself is held in by (2) rivets at the bottom of the door and (2) 10mm nuts at the top of the door.
Note that in the picture below it shows "bolt" locations but you should see rivets in these locations if this is the first time your window regulator has been repaired. As noted above, you can use bolts and lock-nuts
in place of pop rivets for re-attaching the window regulator and motor as was done with this particular door.
Lower the window so that the rivet locations for the (2) rivets attaching the window glass are visible. Secure the glass to the door using duct tape so that it won't "drop" when you remove the rivets.
Using the center punch, push the rivet center pins out so that you can drill-out the rivets. Using a drill, carefully drill out the rivets and remove.
Remove the glass from the front door by lifting it up and out ("outside" the car). You will need to angle the window to get it out.
Be sure and retain the white, plastic mounting "washers" attached to the window glass.
Remove the (2) lower rivest attaching the bottom of the window regulator and the (2) 10mm nuts attaching the top of the window regulator.
Remove the (3) rivets that attach the power window motor to the inner door frame. Disconnect the window mootor wiring harness from the window motor. The window motor and the regulator have to be
removed as a unit and disassembled / reassembled outside of the door. Once the rivets are removed and the window motor wiring harness is disconnected, remove the motor / regulator assembly from the door.
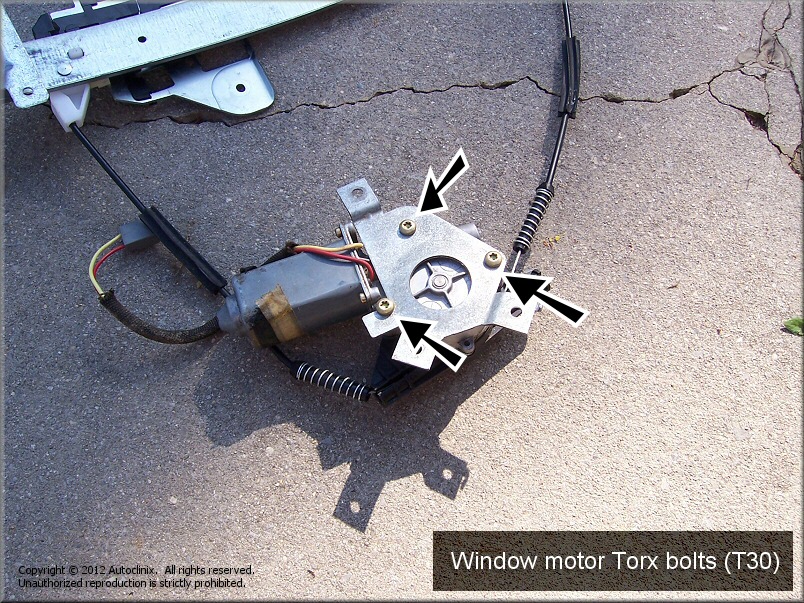
Remove the window motor from the regulator by removing the (3) Torx T30 bolts that attached the window motor to the regulator (see pic below). Install old motor (or new motor) onto the
new window regulator. Although the new regulator we bought had some lubricant on the window track it didn't seem like much. As such, we added some white lithium grease to the track before re-installing the regulator / motor assembly.
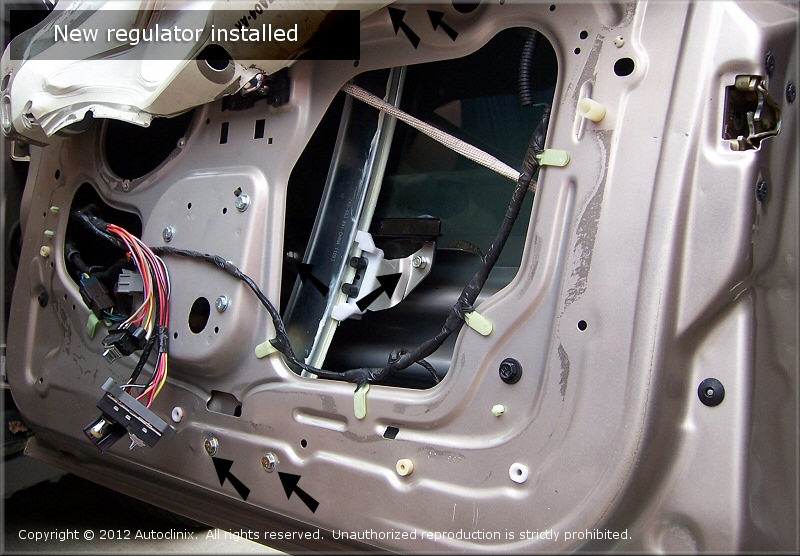
Re-install the regulator / motor assembly into the door. Install the (3) rivets that attach the window motor to the door using the pop rivet tool. Install the (2) rivets attaching the bottom of the regulator and loosely
install the (2) 10mm nuts that secure the top of the regulator frame. Do not fully tighten these yet as you may need to adujust the regulator position to align the the window glass and keep it from binding.
Re-connect the window motor wiring harness. As noted earlier, you can use bolts and lock nuts in place of rivets for this repair. We did this on our first window as pictured below. In subsequent repairs we used rivets
and found that to be a much more preferable approach. Sticking our fat hands inside a door with sharp sheetmetal edges while holding a wrench and tightening a lock nut was an undesirable experience.
Re-install the window glass by sliding it in from "outside" the door being careful not to scratch the glass. Once the glass in place and in the window track, line up the mounting holes/washers on the window
with the corresponding locations on the window regulator track. You may need to (carefully) adjust the regulator's track position by using the window motor. Once lined up, re-install the (2) rivets attaching the window
to the regulator.
Check to make sure the window goes up and down smoothly and without binding. If needed, adjust the regulator position and angle by loosening the upper (2) 10mm nuts attaching the regulator. Once the window is aligned properly
tighten the 10mm nuts.
Re-install the door speaker by reconnecting the speaker wiring harness and re-installing the (4) Phillips screws.
Re-install the moisture barrier and secure along the edge of the door. You may need to use some tape to re-attach the moisture barrier. We used aluminum duct tape to make sure the barrier was
attached and securely in place.
Re-install the door panel making sure that all the panel attachment "pins" are intact and in place. Re-install the (5) screws that attach the door panel to the door. Re-install the (2) screw covers on the door pull strap.
Re-install the power window / lock control panel by re-conencting the wiring harness(es) and re-installing the screws. Once the wiring is reconnected slide the control panel into the door panel and snap down into place.
Congratulations! You just gave fixed Town Car's window and saved yourself some money (and gained the satisfaction of doing it yourself). After your wash your hands and drink your
favorite beverage please drop us a line and give us some
feedback on the content of this site. We're always trying to improve our content and we love
getting feedback from fellow Do-It-Yourselfers